Sunday, September 15, 2013

I'm finally back!

Hello ladies!(and gentleman too). It has been far far to long since I have been able to post anything (shame). I am so sorry for anyone who actually checks my page for the gross amount of in activity. It's been a crazy few months filled with school,.tests, family things and quite a few weddings!. Anyway this is my first Sunday off in quite some time and though I should be studying for yet another test....I have decided to treat myself to some good plan fashioned nail Polish! Now a fair warning here...it has been a long while since I have attempted much more than a simple top coat on these little digits,  so I'm going easy and trying something simple...Oh and I'm blogging as I go along to ensure this post actually makes it up. So here we go!

Football season is upon us and I am a titans fan!!!! So I have decided to do a titans color scheme on my nails. Nothing too fancy just using my boys colors and attempting a straw manicure. I'm not sure that is even the actual name for it but I have seen many of the lovely bloggers I follow use this technique and I love the results so Let's give it a try shall we?

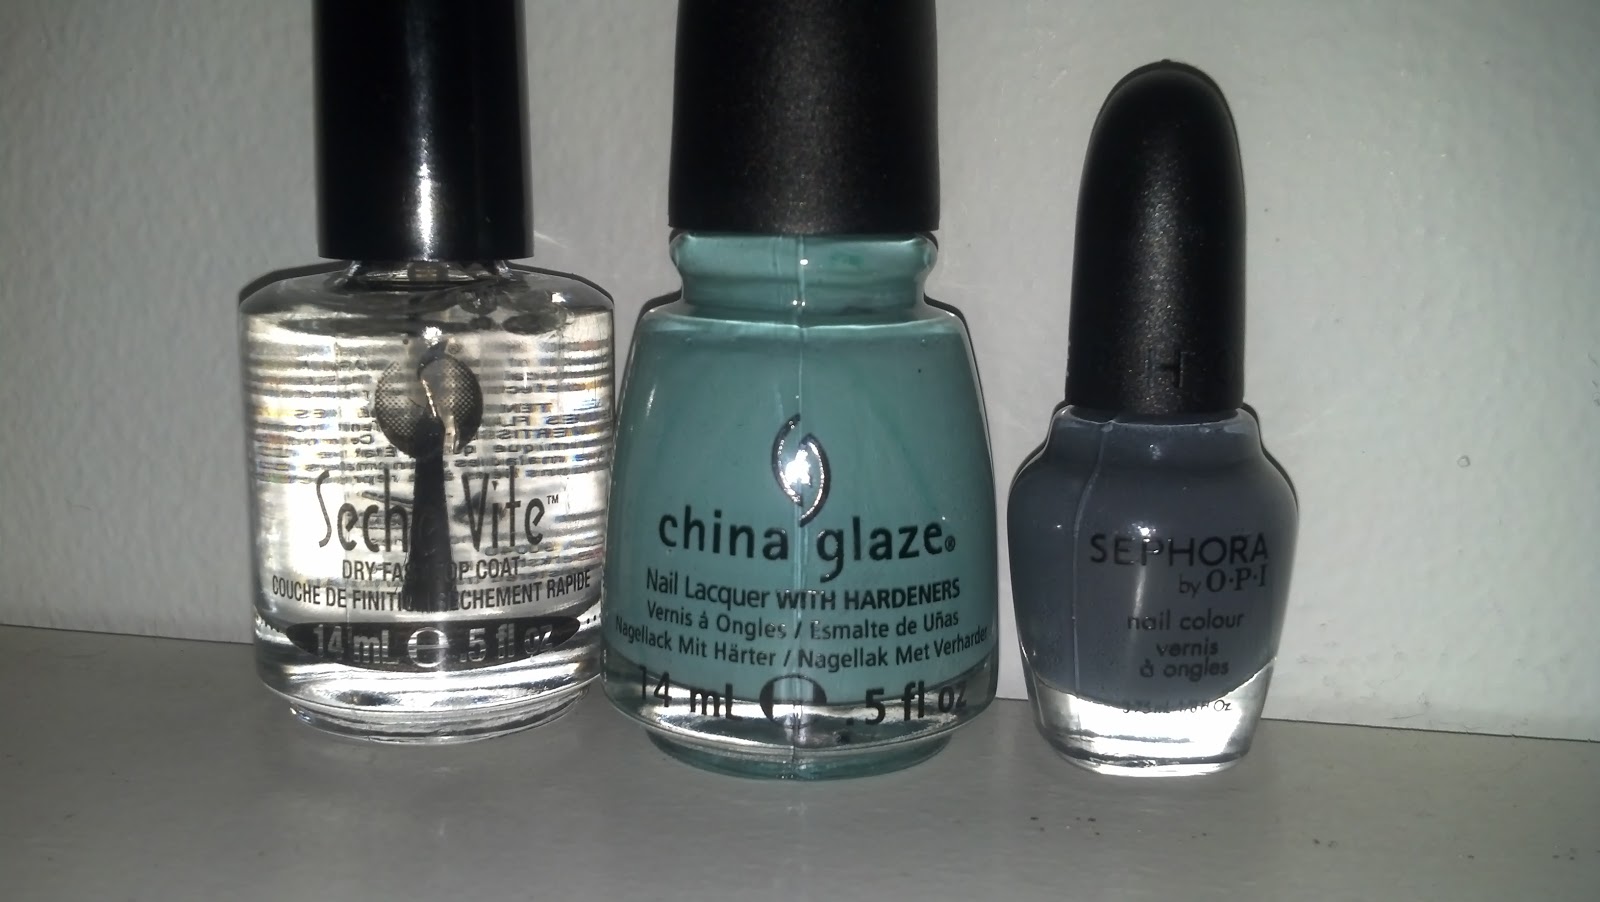
OK so I started with two coats of OPI Unfor-greta-bly blue.

After letting that completely dry...and eating some tacos...I moved on to trying to work with the straw. I used a red swizzle straw.


And used it to sort of stamp little circles on to the nails. For this I used a Sonia Kashuk silver called Smoke and Mirrors.
And a pretty little Titan blue from Essie called Avenue Maintain. 
Don't mind the white on the bottle...had a bit of a Polish explosion: 0(.
so how I did this was I put little dollops of Polish on a magazine and took the edge of the straw and rolled the edge of it in the Polish. I learned the hard way that simply dipping the straw just creates a big blob on the nail instead of neat little circles. I finished you the look with one of my favorite polishes as an accent nail, OPI liquid sand in Tiffany Case. Love love love this color.

So here is the finished look.


It didn't turn out quite like I had hoped. Mainly because I had some issue with placing the little straw circles in an creative and pretty way. But Hey it was my first try and That's what this blog is all about, not just sharing the good but Also the bad and the ugly; 0). What do you all think?
Hope you all enjoyed this little adventure. As for me it's time to watch the final 4 minutes of my game! Go Titans!!!!

keep it polished!
<3, jess

Sunday, March 3, 2013

Duck Dynasty Entry

Hey all! How is your Sunday going? My Sunday has been great. In fact I am blogging from the happiest place on earth :0) so you will understand if i make it quick. I just wanted to quickly share my entry for the Duck Dynasty Nail Art Contest put on by the ladies over at polish gone crazy. You can find the link to their blog under the blogs I follow tab.


I have never watched the show so i was unsure of what i wanted to do. I knew camo was a must so I started there. I remembered a shirt I own that says " what the duck!?!" and it seemed fitting seeing as how I hear the people on the show are ridiculously funny in their own very odd way :0).
I am fairly certain I wont win but i decided to submit anyways to add some funny factor. 
You should stop by their facebook and check out the other entries. www.facebook.com/polishgonecrazy.

As for me I am off to explore the caves of the Matterhorn in search of the yeti!

keep it polished!
<3 Jess


Sunday, February 24, 2013

Dr. Seuss!

Hey there everyone! I am so bummed that I haven't had as much time to blog...school started and physics is taking up sooooo much of my free time! I am committing to at least 1 post a week though, so keep an eye out! Today's post is quick ( I'm on my lunch break) but I wanted to share these fun Dr. Seuss nails.

My roommate is also a preschool teacher and they are doing a whole week on him, so naturally we had to do nails to match. :0)


So this is her right hand. In case you can't tell, the pinky is Thing 1 from Cat In The Hat, ring finger is the foot from The Foot Book, middle and thumb come together to form Cat in the Hat ( I took that design from the talented Sammy at the nailasaurus) and the pointer finger  is the plate of green eggs and ham.


As for the left hand, we have the cover of The Foot Book, the middle and thumb form the lion from Apples on Top, ring finger is a delicious green ham and pinky is Thing 1's partner in crime Thing 2. 

What do you all think? We were both pretty happy with the results :0)

Welp lunch is over and I gotta head back.

Keep it polished!
<3 Jess

Friday, February 15, 2013

In Memoriam Of David Glenn

Hello everyone. Tonight I am writing to you in a bit of a somber mood. You all know I love doing nail art but it's not often I get to do nail art in the pure spirit of love. I am sad to say that my best friend Ashley had her uncle pass. Before I go on I would just like to say a little something about David. I only had to pleasure of meeting him once, just this past week while he was in hospice care. From all the stories I have heard he was such a gentle man, who loved Scooby Doo, winking at his sister, and above all else he loved God. I wont go into much detail but he was a man who in his 50's had the mind set of a young child. He was incredibly gentle and loving and had been struggling with his health the past few months. His family whom I love dearly have been visiting him every day up until his untimely pass last night. 
 I got the call from my friend Ashley today at work "David passed...can we please just get together and do nails in memory of him". It was my pleasure to spend my evening with her, sharing a drink and stories of David and how much he touched us and will be missed.  


So here is what we came up with.


Id like to just ask all of you to please say a prayer for Ashley and her family during this time. Heaven got one more angel..Rest in peace David.

 I'm closing this post with a song for my best friend....I love you sooooooooo much and am here for you whenever you need me. 

Keep in polished. 
<3 Jess

Tuesday, February 5, 2013

Just A Quickie, Challenge Day 5

Hi friends! I am sorry to say but today's post will be a short one as I am not feeling to well :o/ I did however want to at least post today's FFF challenge: 3D/ Decal.

I chose a simple design and used these awesome 3D rhinestone nail accents that my mom got me for my birthday.


I apologize for the sloppy black tips, like I said I am not feeling well and just wasn't up to spending the time but I really didn't want to miss another challenge day (yesterday was the first). That being said I hope you all can forgive me.


Here is what I used and a close up of the little bows.


From left to right:  2 coats of a nameless Sephora mini from their Tinsel Town collection, followed by 1 coat of No 7's "Charm",  black striping polish for the tips that I received in last months Nail Art Society bag, and a generous topcoat from Kiss Acrylic Top Coat. I used that instead of Seche Vite because it was thicker and I wanted to make the bows stick without using nail glue (seeing as how they will only be on for 24 hours)

Please please please check out the links for the other ladies pages, they are all so talented :0)


Until next time! Keep it polished!!!!!
<3 Jess

Sunday, February 3, 2013

Day 3 Water Marble

Hello again! Happy super bowl Sunday! Are you all ready for the big game? I'm not much of a football fan ( although I do love my Tennessee Titans) so i will probably be spending my day chomping down on food, doing some nails (hopefully) and looking up at the t.v. when the commercials come on :o).

So again I am pretty excited  about today's mani. The challenge options for day 3 were either dry or water marble. I have never tried either of these techniques but i have been dying to try a water marble. I was a bit afraid because several of my favorite bloggers  have blogged that they hate the process and some have real issues with it. I found a great online tutorial here and decided to grab some polishes and dive in!

Here is what I used


From left to right: Sally Hansen Xtreme Wear "White On",  my trusty dusty China Glaze "For Audrey", Sinful Colors "Slate", and good ol' fashioned scotch tape to wrap of my fingers and make the clean up process easier.

Just as the video shows I just took a cup of water and placed drops of polish right in the center, I waited for each droplet to fan out before putting in the next. The pattern I used was white, teal, then grey. After producing several rings I used a toothpick to drag the colors into the center and create a design. Once I had something I was happy with I simply dipped my nail into the water, blew on the water to break the polish seal and used a q-tip to soak up the excess before removing the nail.


As you can see, I was not ready to give up my stained glass accent nail
(that thing took me a good 30 minutes!) so I chose colors that complimented the existing color pallet and just re-did the other 4 nails.

Overall I like water marbling. It was kind of fun and not too messy with the aid of the tape. After doing my dominant right hand I did understand some of the frustration others had, mainly the excess attaching to my design and flubbing it up a bit. But overall like I said it was fun and gives a really cool look. I would like to get some more practice under my belt to try and create even better designs as this one is just a bit hap hazard.

I cant wait to see what everyone else came up with today. Don't forget to stop by and check them out!


Keep it Polished!
<3 Jess

Saturday, February 2, 2013

Stained Glass Accent

Hey there everyone! How is everyone's Saturday going? Mine has been wonderfully relaxing with the exception of a few loads of laundry.

I am super excited about today's post. As you know I am participating in the flip/flop February put on by Jilian over at jilltastic nail designs, you can check out her blog here.

So today's challenge options were stained glass or accent nail. This was a rough decision for me...I knew I didn't want to just do an accent nail because I often do those and this is a challenge meaning you should challenge yourself. Problem was I have never done a Stained glass nail, didn't really know if I wanted it on all of my nails, and to be honest everything I googled for this technique was really not my style. And then I saw a super detailed super awesome design that was of a scene from a church window. I knew I wouldn't be able to pull that off but it gave me the inspiration I needed to refine my search. I finally found a cute dragonfly stained glass art piece that I thought I might be able to pull off. You can check out the artwork here.
Since this was my first attempt at this I decided to combine today's options and do a stained glass accent nail.


I started off with just one coat of Zoya's Zuza


 Then looking at my picture for reference I began to carefully paint on my dragon fly using some acrylic paint from a set my sister gave me for Christmas (seen above) and my thin paint brush 


After letting that completely dry I decided to do the outline of my "glass panes" with a dark blue sharpie (I could not find black to save my life). I am not sure if this is considered cheating because I didn't use black paint but I just new I wouldn't be able to outline it without messing the whole thing up (I am extremely new to freehand painting designs).


I am so pleased with how these turned out!!!! I know its not super crisp but for me this was pretty freaking good!

Here is a picture of the accent nail next to its inspired piece


Not too shabby if you ask me :o). Hope you all enjoy these as much as I do. Also don't forget to check out the other talented ladies joining me on this challenge journey

Thank you all for stopping by! Check back tomorrow for day three, pretty sure I am going to try my first water marble so it should be interesting!

Keep it polished!
<3 Jess

Friday, February 1, 2013

Flip/Flop February Day 1: Gradient

Hello lovelies! Happy Friday!!! I am certainly looking forward to my weekend, how about you all?

Today I am excited to start a new challenge! I know I know I totally failed the last 31 day challenge BUT this one is a no pressure relaxed challenge that allows you to do as many or as little as you would like. Perfect for a working student like myself. This challenge is also great because it allows you to  choose one of two techniques  each day. Day one was gradient or skittle mani. I decided to put on my big girl pants and try yet again to successfully pull of a gradient nail. I have no idea why this is so difficult for me but hey practice makes perfect right!?!

So here is what I used from left to right: my trusty dusty little glass shot glass thingy ( obviously that is the technical term ;0) ) I use this to pour my acetone and dip my angled liner brush in it to clean up my edges. Next up is a Sinful Color, which I will update and name later because I am at work and currently forgot the name ( for shame!). I used that with another nameless Sephora mini in a darker shade of purple.  My top coat was the ever fast drying Seche Vite. Also pictured is my makeup sponge used to apply the polish and my baggie used to set and dip the polish.

Ta da! :0/....OK so I know its not perfect, this is a technique that I really have yet to master, but hey that's the whole point of this challenge. Go big or go home is what I always say.

There are a few techniques floating around out there to achieve this look. I was short on time so I chose to paint strips of color on my baggie, lighter shade on top darker on bottom. Then I took my makeup sponge and dabbed on the color and transferred it on to my nails. This took several layers of sponging but went relatively quickly. After I had my desired color I let it dry and cleaned up the edges ( this manicure is VERY messy) once all of that was done I applied a coat  of Seche Vite and called it a night.

Be sure to check out the other lovely ladies participating in this challenge!

Keep it polished!
<3 Jess

PS please excuse my ugly ring finger, being a pharm tech often means nasty paper cuts :0(

Saturday, January 26, 2013

Birthday Nails Part 1&2

Hey all! Boy has it been a busy week! I turned 27 on Wednesday and along with celebrating with family I have been planning my birthday bash. I just wanted to pop in and show you what's been on my nails this week.

My amazing boyfriend has been so sweet and sending me an Ulta gift card each day of my "birthday week" so that I could get myself some new polishes (seriously, how lucky am I?!?)


I will be posting my birthday polish haul on Sunday but here is a sneak peek 


Can't wait to share everything with you all.

Now onto the nails! For my birthday mani I did a bit of a glitter gradient with a stamped accent nail.


I totally loved these! To get the look I used 3 different Ulta polishes


From left to right: Broken & Blue, Walking On Broken Glass, In Hi-burr-nation


The accent nail was stamped using Cheeky plate CH33 and Avon's  Glisten Scintillant 


I kept that mani on until this evening and was sooo sad to take it off...but alas tomorrow is my party! The theme: mustache, tall socks karaoke party ( fun right?). Naturally I had to do a mustache mani


Eeeek! I just looooove them :0)


For this magnificently fun mani I used a few new products from my birthday haul


I did a base coat of OPI's Nail Envy (original formula) followed by 2 coats of Sally Hansen's Grass Slipper. After letting it all dry I used my nifty new mustache/kisses stamping plate that my mom gave me as a b-day gift ( which I have been wanting sooooo badly after seeing them on amazon. I apologize again for not knowing the manufacturer). I used a black striping polish that I received in my January Nail Art Society bag to stamp the images. I know that's a strange use for a striping polish but it seriously gave me such an opaque color for my stamp.

I am very proud of both of these looks. What about you? Which of my b-day manis did you enjoy?


Can't wait for Sunday when I have time to show you all my goodies from the week :0) For now its bed time. Have a great weekend!


Keep it polished!!!!

<3 Jess

Monday, January 21, 2013

Quilted Nails

Hello again! As promised I am back with my second post of the day.
I gotta say I am proud of myself for being so productive!

As I mentioned in my last post, I was watching football with some friends while doing my nails, ( now that is my idea of Sunday fun day!) Anyways I have been wanting to do a quilted nail for a while and decided today was the day.


I started with 2 coats of Ulta's Blue Streak for my base. I have had this color for a while but have not tried it until today. I really enjoy Ulta polishes, they have a great brush size, amazing color, and go on really smoothly.
After letting that fully dry, I carefully applied strips of striping tape to produce my quilted pattern and once I was satisfied with the spacing I applied a generous coat of yet another unknown Sephora mini shown here

Sorry yet again for not knowing the name. Now that I am aware the minis do not have their names I will be sure to write down the next set I get.

Now for those of you who haven't used the striping tape in this way its important to know when you do this, the key is to remove the tape ASAP after applying the second color. When I first used striping tape I was not aware of this and it didn't end well.

I didn't like just having the one accent nail so I decided to spruce it up with some pinkish-purple rhinestones and topped it off with a generous coat of Seche Vite.


While I like these nails, I was hoping to achieve a bit more of a quilted texture. Will have to read up and see how other bloggers are doing it.

Well I'm off to bed, have a great night!
Keep it polished!
<3 Jess

Sunday, January 20, 2013

the wishing flower

Hey all! Long time no post! So sorry for that. I have been crazy with work and planning my birthday party, yay!!!!

Anyways just a short post today to show off a little something. Yesterday I got together with my mom and had a chance to do her nails which was so fun for me. 

We decided on a "wishing flower" design. This "flower" is special to us because when I was young I would often pick them for her  on special occasions (mothers day, birthdays etc.). I had no clue they were actually weeds, to me they were beautiful and I loved making wishes.

After seeing the design on pintrest I knew it would be something my mom would enjoy. Please be warned the picture isn't great and,love my mom, she just couldn't sit long enough for me to clean up the edges so its a bit messy.


:0) even though its a bit messy, I like it for the pure sentimental value.

Now for the info: I used China Glaze Exotic Encounters which is an awesome forest green with a slight undertone of an almost blue? Lol obviously these are my descriptions and not those of the polish maker ;0). For the flower I used acrylic paint and nail art brushes, this was my first time using the acrylics and I like it much better than trying to paint with nail polish.

I did my nails as well today while watching football but will have to make you wait till later as I am about to meet up with one of my besties.

Have a great day and as always...keep it polished!
<3 Jess

Tuesday, January 15, 2013

saran wrap mani with rhinestone cascade

Hey there everyone! How was your Monday? Mine was filled with work and cleaning but I finally took some time to re do my mani. This is technically from the 31 day challenge, though I am not fully committed to doing that anymore. Not because I don't think its an amazing idea, but because when you work full time it is difficult to do a new mani every night ( not to mention the fact that sometimes I just really like what I have on and want to enjoy it for a few days).

So I have decided to use the challenge days as inspiration without a specific time frame :0) which is exactly what I did tonight.


My version of the saran wrap mani. What do you all think?


I have to say I am super happy with how this turned out, it was my first attempt at this type of manicure but it was super easy! The hardest part was trying to cascade the rhinestones ( an idea I copied after seeing it on one of my patients nails)

I used 2 coats of a Sephora color from their tinsel town collection for my base ( sorry I don't know the name, I threw the box out without realizing the mini bottles do not have the color names on them). After waiting for it to dry I painted each nail with a coat of one of my all time favorite colors 'For Audrey' by China Glaze and used pieces of crumpled saran wrap to dab and pick up some of the color. Once that was all dry I gave it a generous top coat of Seche Vite to protect the designs and ensure that my rhinestones will not fall off.

All in all it was a successful first try and I think I will definitely use this technique again. But for now it is freezing and I am off to get all comfy cozy in bed. Happy Monday everyone!

Keep it polished!
<3 Jess


Saturday, January 12, 2013

pink and polished giveaway

Hey there! So I know I only have 8 followers as of right now ( and im so greatful for each and every one of you!) but Kristine over at pink & polished has passed the 300 Follower mark! How exciting is that!?! To celebrate she is holding an awesome giveaway with some great prizes. Head on over and check her out and enter yourself for a chance to win!

www.pinkandpolished.blogspot.com


Keep it polished!
<3 Jess

Friday, January 11, 2013

Zoya color swatches: Akyra, Reagan and Crystal

Good afternoon everyone! Today I am excited to show you swatches of the Zoya polishes I posted yesterday :0)


Meet Akyra. So again the pictures just do not do this color any justice ( I am going to look at cameras and lighting today so hopefully that issue will be fixed soon). I would describe this color as a peacock feather green. It has a hint of blue when the light hits it sometimes. The swatch shown is of 3 coats with no top coat.


Look at Reagan, what a beauty! So to be perfectly honest when I first got my package I was least excited about this color. In the bottle it looked different then what I had seen online, I still was excited for it but I was hoping for a little more at first glance. Boy was I wrong! After swatching this I fell in love. Its such a great pink, I don't really even know how to describe it, its just amazing!

Last but not least here is Crystal


I really like this color as well...it looked a lot darker in the bottle and again didn't photograph well. It is a great color though...I'd say its an ashy blue with pretty little gold flecks. It's so gorgeous when the light hits it :0). These pictures are of the color swatched  with no base color coat, which I don't recommend because it took 6 coats to get this coverage. I'd like to try it again using a base coat of another color and see what happens.

All in all I am very happy with these Zoya polishes and will more than likely be ordering more soon :0)

Until next time....Keep it polished!
<3 Jess